![]()

 Home
.
Gallery
.
Studio
.
Vitae
Home
.
Gallery
.
Studio
.
Vitae
|
A friend on the Metalmeet site asked me to show how to form a copper vase out of a piece of copper tube . Tutorial index - go to page: 1 - 2 - 3 - 4 - 5 - 6 - 7 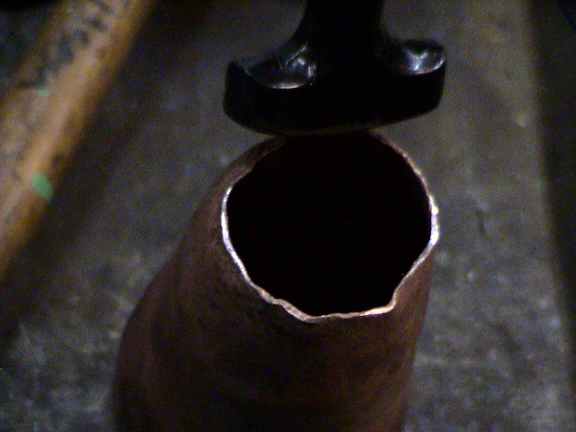
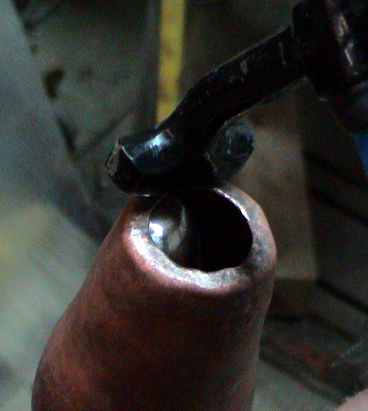
Here I am starting the process of putting a flange on the bottom edge so that I have surface area to solder a disk on. 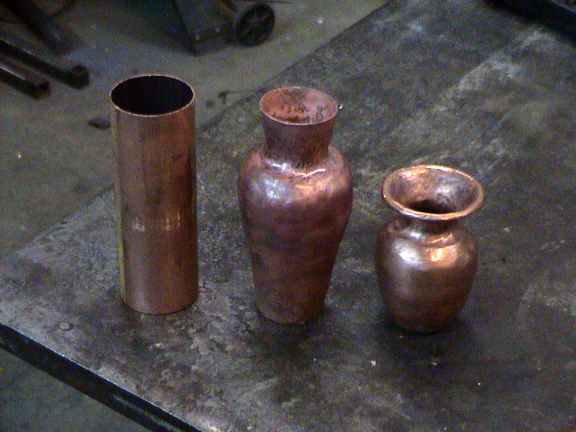 This a progress shot just prior to planishing and the second anneal. Copper work hardens rapidly and must be repeated annealed and quenched to make it soft enough to work, but there are other things that can go wrong as well. the next three photos show a surface texture that can be described as orange peel. It is the metal's way of telling you that it has reached it's elastic limit and is about to tear. You must planish the surface smooth before continuing. 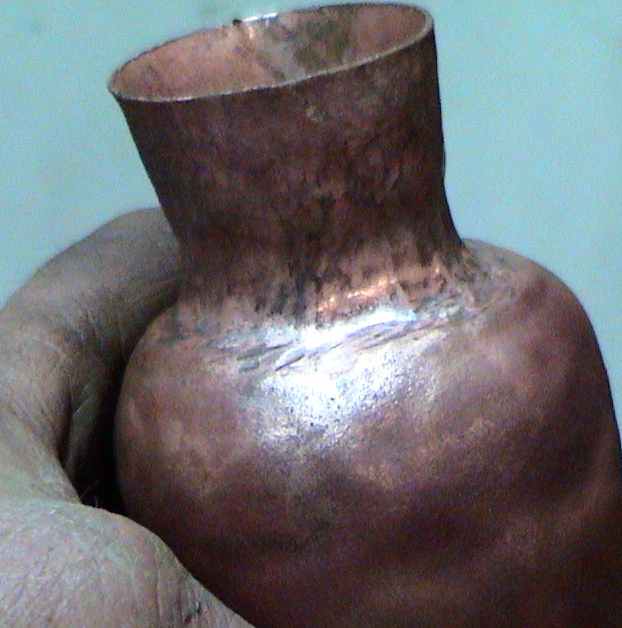 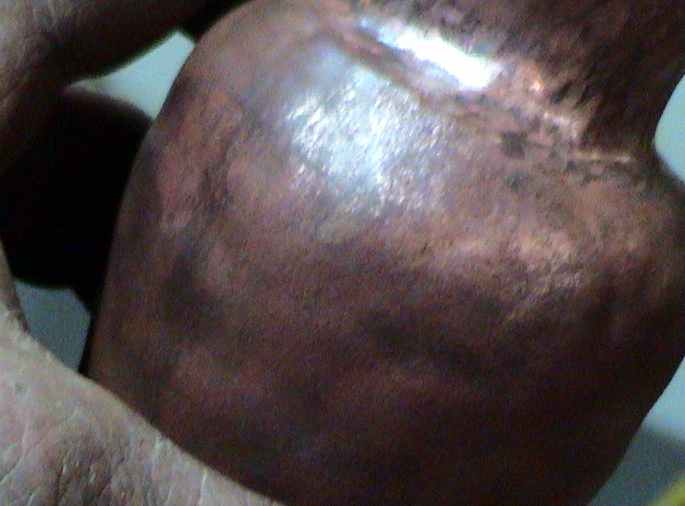 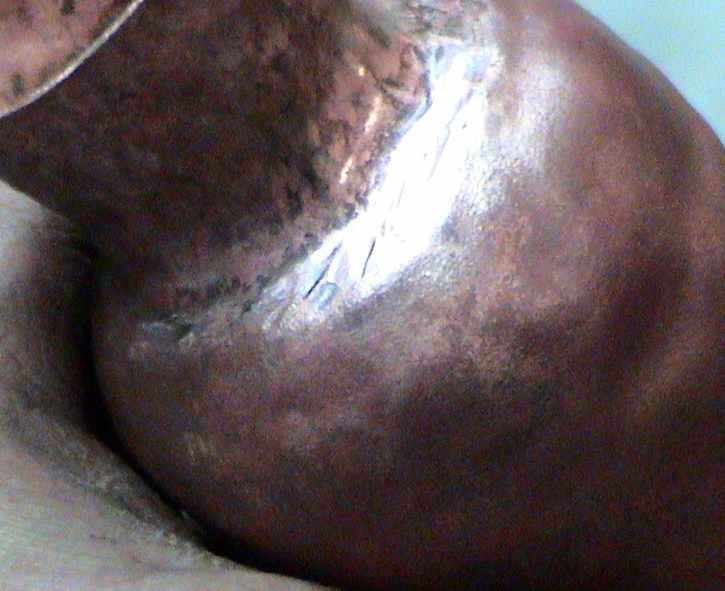 When working nonferrous metal it I was taught to planish before annealing to rework. In nonferrous the planishing will actually make the material harder, work harden it; however it does reorder the material and make it uniform so there are fewer places for cracks to start. What is the orange peel?Grab one of those strong plastic garbage bags and gently pull on it in one spot. Suddenly a weak spot will form and it will start to stretch. The area between where you are pulling gets thinner and weaker and stretches out in small area in between your hands. It does not stretch evenly, once a weak spot forms the stretching continues there as it gets even weaker.Now think about a very soft surface, a thin sheet of clay mud, as it dries the surface gets taunt and hard and then gets stress marks and cracks into a pattern of rough hexagons etc. How does mud relate? As it dried some spots were stronger than others. As the tension develops the area between them gets stretched like the plastic bag until they finally tear. The orange peel matte surface of the unplanished metal is like the surface of the mud, just ready to crack. If you look at it with a magnifing glass there are lumps and valleys. Those lumps are all hard strong spots, those valleys are all stretched low spots (like the plastic bag) . All those valleys add up to a net of weak spots across the surface that might as well have "tear here" stamped on them. Even though the thickness is close to the same, those same high and low spots make up kind of a "truss system" and make it stiffer and stiffer plus the network of weak spots adds up to brittle. The high spots were stronger than the area around them. stretching made those areas thinner and thereby weaker. Planishing squashes down those high spots so that they at least have the same cross section as the stretched areas in the valleys. This crushing from planishing also smashes down those mini trusses so that the material does not have that structural stiffeness. This has not softened the material, it has evened out the material and destroyed structure that was making it stiffer and focusing stress into the weaker parts. If you just anneal a piece without planishing it and then start to work shape in it, it will be softer but all those bumps are there and that network of thin "tear here" valleys. When you start to stretch the piece, everything will be just as soft, but the hills are thicker and therefore stronger, and all the stretching will happen in the weak spots. The valleys will get wider and thinner. They are seed for material failure, just like that perf line on your check stub. 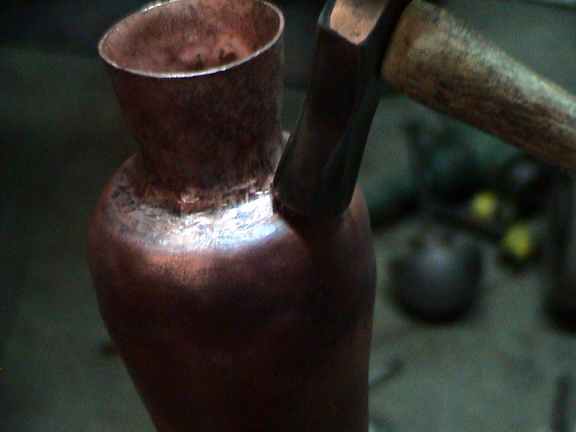
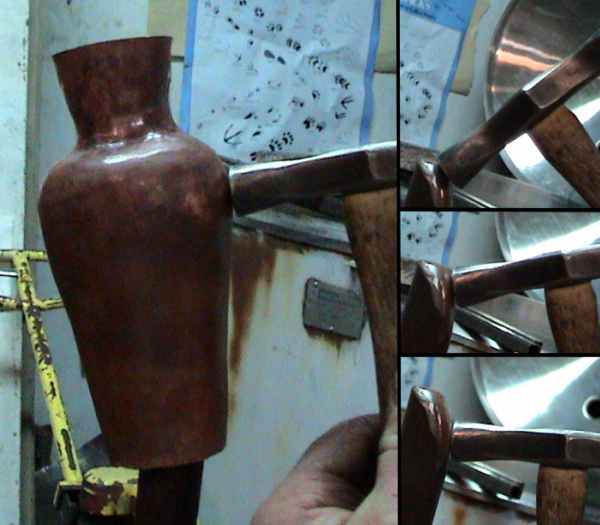
You need to planish out the orange peel. That is take a smooth faced dolly/stake and a smooth faced hammer and crush the texture down to a smooth surface. For the sake of appearance and also so you don't miss spots, it is best to lay down an overlapping pattern of hammer blows as you work. If you are working on a design that has a natural grain texture in it. sketch some lines from that pattern onto the surface and use the planishing process to start adding character to your texture.
The above sequence shows how you can rotate the vessel on a stake and change the hammering contact point to get at various parts of the surface. Click here to go to page 5. |
|
|
|